Vanilla orchid- surviving the winter…


I tried to crop out the messy kitchen...

I tried to crop out the messy kitchen…

Last fall, I brought my vanilla orchid inside after its summer vacation on the back patio. It was alive, and had grown quite a bit, but it hadn’t topped out the trellis….Now, as I look at the thermometer and begin to count down the days until it, and all my “house plants” can go outside, the vanilla vine is still alive, but still not huge.

The trellis I built is basically a quilt made out of hardware cloth, wire fencing with smaller holes than chicken wire. The middle layer of the “quilt” is sheet moss. I rolled the quilt into a cylinder about 4 inches in diameter and 2 feet tall. I filled it with orchid mix, then set up a pop bottle with pinholes in the bottom.  It is both a tower for the vine to climb on, and an evaporator. It is also modular- I can build another cylinder that will fit into the top, if and when this little vine decides to grow up to the top of this one.

If you are wondering about how much support you need for your vanilla plant for the first year or two, the answer is, a chopstick would have worked for this guy. It doesn’t need a two foot tall tower.  However, the other design element was for a humidity source for the plant- it is dry here, inside and out, on the front range of Colorado, and the trellis also acts as a humidity tower. It spends the winter in The Boy’s room, which also has a fish tank, and a new anole habitat-( and the cricket habitat that goes with the lizard- I didn’t realize that when I said yes to the lizard, I was saying yes to crickets, as well) The fish tank evaporates quite a bit, as well as the anole habitat, but it is still a centrally-heated room in a house in a semi-desert.

When I first built the trellis, the vine was only 4 inches tall- now, roughly two years later it is about 12 inches tall. If I were starting again, I might just use a chopstick, or piece of bamboo, and maybe use a hurricane lamp as a terrarium.

Advertisement

Self watering pot- a goldfish story.


Frozen Hillbilly Goldfish Pond.

Frozen Hillbilly Goldfish Pond.

I pinned something on Pinterest that was repinned more times than anything else I have put up. Then, my brother found it somewhere and sent it to me, as well.  It is a tutorial for a mini pond in a pot, with divisions for a wetland area with more soil and cattails, and a pond area, with a water lily. It is honestly adorable.

I have worked my way up in mini-ponds- from a 10 gallon tub, to a 20 gallon half barrel, to my current one, a 100 gallon horse trough, aka the Hillbilly Goldfish Pond. I have learned that the more water, the better the pond works. The fish like it better, (although there is some…attrition). The plants like it better. This experience tells me that the little patio pond depicted probably wouldn’t work, but it is adorable. People like adorable.
It makes me think, though, about adding more “wetland” area to my pond. And with that, it makes me wonder about combining the idea of a self watering pot and my pond. A self watering pot is a porous pot  with a reservoir underneath that holds a constant source of water. Roots are always able to access the water they need, so they tend to grow better than they would in regular containers. Earthbox is one brand. They seem expensive and  ugly. (that’s one way you can tell I don’t make money from these links.   If they were affiliate links, I would say, “kind of expensive, and kind of ugly.”)

In a six foot long pond, what about putting in some cinderblocks, and some pots that would keep the roots wet, but the tops dry, so the plants don’t rot? Or islands, out of floating styrofoam, for lettuce and spinach? Or grow bags with squash, and the vines could drape over the sides of the trough? I would still want enough open space for fish, and I wonder if the goldfish would wind up eating the roots?
That’s what’s great about winter- I can imagine these ideas all day and night, waiting for the pond to thaw.

Vanilla Vine update


Not only has my vanilla plant survived the winter, but it has even grown- it isn’t to the top of the trellis, but it has quite a bit of new growth on it, and some aerial roots going into the moss on the trellis. The trellis is made of 2 layers of hardware cloth, with sheet moss in between the layers and orchid potting mix inside the cylinder.

Ignore the messy kitchen counter…

My pop bottle humidity system is not perfect- it takes a while to dial it in to slow drip, and about once a week I just bring the whole contraption to the kitchen and hose it down with the sprayer. I moved it out to the back porch today, and I’ll splash it with the hose regularly.

I added a grocery store orchid to the pot- vanilla is a type of orchid, after all, and they should like the same conditions. I don’t remember what kind of orchid it is, and the tag just says “orchid.” C’m0n, grocery store…

Short on rupees? Aren’t we all.


I used to spend a lot of time on a message board at You Grow Girl.com  and there was a thread once about the advisability of re-using potting soil, and using fillers in the bottoms of pots to take up space, rather than filling an entire pot with soil. There was a lot of advice back and forth about using Styrofoam peanuts, or aluminum cans, in order to avoid buying that extra bag of potting soil. There was another poster, who was on the boards frequently, a guy from India, and he responded to this thread uncomprehendingly, “Why are you so worried, a bag of soil only costs a few rupees, just buy another bag of soil!”

Well, maybe you don’t have very many rupees to start with, or maybe you just spent a bunch of rupees on a really pretty flower pot, or ski tickets, or new shoes…

I do wind up buying new bags of soil every year, of course, because I have a lot of containers. I also re-use soil. I typically dump my annual pots out into a big bin, as well as the pots of things that were supposed to be perennial but didn’t get that information and died anyway. I dump the pots out, break up clumps and stir in more compost.

The other strategy I have been using is to fill space in the bottom of big pots with stuff other than soil. Like I said before, I have seen recommendations for using styrofoam peanuts or pop cans. The one time I tried styrofoam, it was really gross when I tried to dump it and reuse the soil- muddy foam chunks.  It was such a mess, I never want to try it again.

Last year, I read on the interwebs) about a development group  in urban Mexico which was helping people grow their own food in 5 gallon buckets. They got free buckets from stores, but their soil was in short supply, and they were low on rupees (er, I mean pesos) too. They did have access to weeds, sticks and branches. They experimented with chopping up twigs and weeds and filling the buckets most of the way, then filling to the top with good soil. Then they would plant tomatoes and other plants. By the end of the growing season, the sticks and leaves would have decomposed, and they would have rich new soil for the next time.

So, I read this last year, thought about my shortage of pesos, rupees, er, dollars… and thought to myself, I have weeds, sticks and branches… I tried it with two pots, I used twigs no bigger than a pencil to fill most of the pot, then a big wad of dandelions. Since I knew it would break down, I filled it to within a couple of inches of the top, then put in the decent soil and plants.

bucket of weeds- there's more where that came from

One pot held an artichoke, and it didn’t do well at all. I suspect it was because when we left town it got too dry. I was counting on all the organic matter in the bottom to be a reservoir for moisture, but the roots just hadn’t gotten that far down yet when we went on vacation.

The other pot had a pomegranate tree, and it is doing fine a year later. I brought it inside last fall, it went dormant for a couple of months, then woke up again and started putting out leaves with the sun that came through the basement window. The soil level did sink down- it started an inch below the rim, now it is probably 4 inches below the rim.  I had planned on re-potting the pomegranate anyway, the sinking soil just accelerated the process.

In the future, I don’t think I’ll use this method for perennials, it is kind of a pain to re-pot anyway, so doing it twice as often doesn’t seem to be worth it.  I have done it again this year, with a pot of lilies mixed with  sugar snap peas- I want the peas on the patio for snacking on, and the lilies are for color. I could say I want the lilies to act as living trellises for the peas, but that would imply I had planned ahead.  I have a couple other big pots that need filling, for geraniums and stuff, and we certainly have enough weeds and sticks.

Chives- you can grow that!


One of the first perennial edibles to pop up in spring, good old reliable chives.

Do you have a tiny amount of space, and want some herbs? Or, do you have a lot of space to fill and are looking for something cheap that will spread? One of the most reliable edibles that come up this time of year is chives.
They belong to the onion family, but the greens taste much milder than green onions- not as sharp. To start from seed, dump a whole packet on the soil of a small pot, water regularly. Very fine grass like leaves will start to come up, with a sharp bend in the end, and the seed coat still attached to the shoot. Leave it alone, it will fall off on it’s own. If you are starting the seeds inside, harden them off by leaving them outside for an hour or two per day- if you transplant them straight to the outside they’ll burn and die. Moment of silence…
Okay- if you buy a pot at a nursery, they will most likely be hardened off already, and you can plop them into the ground or into a container. They have such a shallow root system they can go into a container with other things.
Snip off individual shoots and flowers- the flowers are edible, and have a funky texture- funky in a good way. Eat them with potatoes, obviously, or deviled eggs. That reminds me, we need to get eggs and mess up the kitchen…there is still dye on the tablecloth from last year.
If you wind up not eating the flowers, let them go to seed, that way your patch will spread. As I said, chives don’t need very deep soil- in fact, when I build my dream shed, I plan to plant chives on the green roof. We just have to tear down that playhouse, mwah ha ha ha!!!

I have also considered the possibility of a chive lawn- it looks so grassy, and doesn’t take much water…and just think of the fragrance when you mow…yeah, maybe not.


Edited to add- I keep forgetting to mention that “You can grow that” is a meme created by C.L. Fornari, genius garden writer. If you came here via her site, welcome.  To find more blogs with growing tips, go to C.L.’s site! http://wholelifegardening.com

You can grow this- microgreens


mmmm...microgreens

Yuppie chow. Rabbit Food. Microgreens. All the same thing- bags of tiny salad mix work out to 20 bucks a pound, but really, you can grow this, right now, on your kitchen counter.
I got a packet of seeds at the store- Botanical Interests is a local company. Their “mild mix” has beet, red cabbage, kohlrabi, pak choi and swiss chard in it. The sprouts are supposed to emerge in 5-10 days, and the leaves are ready to pick in around 25 days, once they get 1-2 inches tall.
You can cut them, toss into a salad or onto a sandwich, and the plants keep growing there in the pot. A few days later, there is enough for another salad- theoretically.
I put them into a 6″pot on the kitchen counter- they don’t need much light until they sprout, and once they sprout, I’ll move them to where they’ll get more light. There is enough in the package for a whole flat, but I don’t want to give up that much space for it. It suits me better to get a pot going now, then start another in a few weeks, that way as the first pot is petering out, the new one is coming into production.  As the weather gets warmer, I can grow this same mix outside as well. So can you- you can grow this.

I scattered the seeds thinly on moist soil, and I gently spray it twice a day with the kitchen sink sprayer.

CSI- Meyer Lemon


Now, that's what I call a dead parrot.

A corollary to the idea that I should be knitting (and skiing) at the top ten percent of my ability, is that if I am not killing plants, I am not challenging myself as a gardener. Well, I killed my Meyer lemon tree, so I guess that counts.
It isn’t terribly mysterious why, though. Not enough water.
Interesting fact, more houseplants are killed by overwatering than underwatering.

Not in my house, you say, well maybe. Usually, overzealous plant owners water too much, which waterlogs the roots. Roots need oxygen, and when they can’t get it, the plant dies.
Not in this case, however. The Boy’s room has windows facing south and west, and he is generous enough to let me keep my plants in there- in the winter he lives in the jungle room, essentially. I usually go in there every few weeks with a jug of water and splash everything. Most of the plants are in fairly large ceramic pots, but the Meyer lemon is…was in an 8 inch diameter clay pot. The splash of water every couple of weeks was not enough to keep the soil moist.
When I discovered the wilty leaves, I overcompensated by thoroughly soaking it in the kitchen sink. It died anyway.
Cue the sad music.
I’ll get another Meyer lemon- try to keep it going. I can’t decide whether I should buy a larger size than what I started with (I paid roughly $10 for a tiny plant in a 2.5 inch pot) so I can just pretend I didn’t lose a year’s growth…what do you think?

Vanilla Vine Update


So, I built this whole elaborate trellis, and posted a tutorial, for a vanilla orchid vine that is supposed to get to 20 feet tall.

I do think having the sheetmoss-filled tower was helpful in raising the humidity around the plant.

It turns out, I could have waited a while.
The humidity tower/trellis is two feet tall. The vanilla orchid is 6 inches tall. Assuming I can keep it alive over the winter, I am going to hope it grows faster next summer. If you got here through Google, researching the care and feeding of homegrown vanilla, rest assured that you don’t need a huge trellis for your vanilla cutting right away.
If you are just a friend or relation, well, I guess you already knew I was an optimist.
We had a frost warning at around sunset last week, causing me to whine and moan and get out the dolly so I could move big flowerpots around, and whine and moan some more. That is when I brought in the vanilla, and took a quick picture, under the lovely fluorescent lighting of the kitchen.
I had picked all the ripe tomatoes I could see, and put a giant duvet cover over the trellis, so I wasn’t too worried about that.
The stress is bringing in the houseplants- tropicals that love the summer weather but can’t take the cold. I usually spray them off so fewer hitchhikers come inside with them- the occasional spider is fine, but no aphids or scale, thank you very much. I couldn’t face doing that last night. This week has been busy for DH and me, and I was hoping I could wait and move flowerpots on Sunday…
It turns out the frost alert was a false alarm, and predictions are for temps in the 70’s and 80’s. Next week,  I will have the strength to wheel flowerpots with citrus trees inside, heave them up to the sink, spray them off, mop the floor….Just thinking about it makes me tired.

I do think having the sheetmoss-filled tower was helpful in raising the humidity around the plant.

Rhapsody in Terra Cotta


I love the way clay pots age- I have had this terra cotta pot for maybe 10 years- I remember being a little appalled at how much it cost- we were broke back then, and it felt like $20 was just so much money for a flower pot. But as the years have gone by, it has acquired such a nice patina, so earthy.

I have since budgeted more money for containers, and buy fancy ceramic pots with blue glaze, but I still really like these beat up old terra cotta pots.

Vanilla Trellis Tutorial


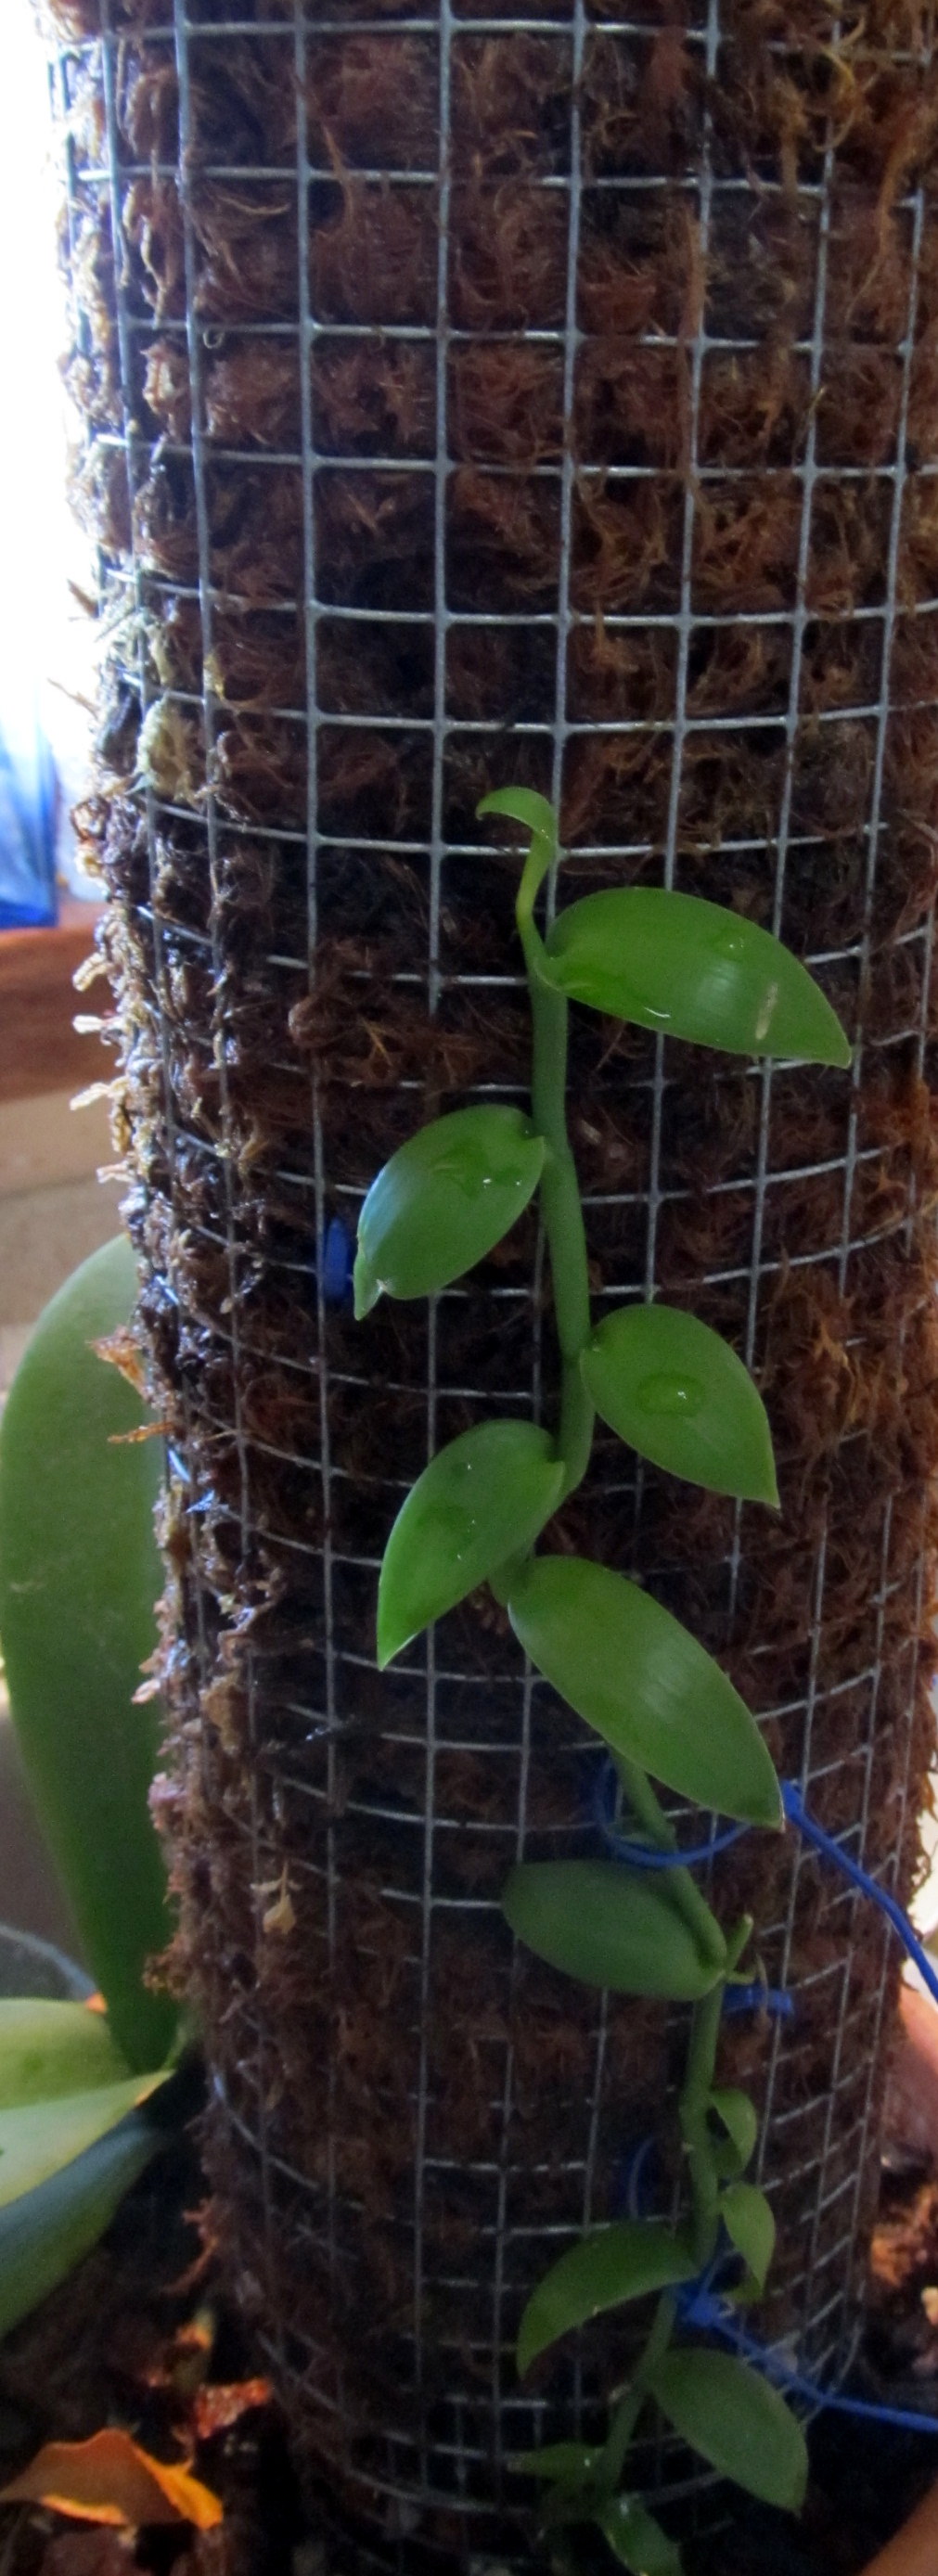
Sweet little baby vanilla orchid- the pale green sticky-outy thing is an epiphytic root.

 I never believed I could grow a vanilla orchid without a greenhouse- credit the Botanic Garden (again- I’m a little obsessed with the place). At the very end of my visit there with my wonderful MIL, we went to the learning center at the children’s section. This place isn’t quite a greenhouse, but it has large south windows. There was a display of herbs and spices, and an employee was working on a plant in a container- wrapping a long vine around a tower made of chicken wire with sheet moss inside. I asked what it was, and actually said “Squee” when he told me it was vanilla.

In “Growing Tasty Tropical Plants,” (ooh, it’s overdue, need to renew it…) I learned that vanilla was not appreciably different from most of the tropical “houseplants” I currently have. Their major needs are something to climb on, filtered sun, and humidity.

The cage the guy was working on at the Botanic gardens supplies two of those needs- something to climb and humidity, because the sheet moss can hold moisture and slowly release it. Filtered sun it can get on the back patio in the summer, and in the Boy’s room in the winter.

I went home and promptly ordered a vanilla orchid plant from eBay, then set about designing my own humidity trellis.  Vanilla orchids don’t bloom until they get to be about 10 feet tall, but I didn’t want to create a ten foot tall cage, so I made mine modular, and figure the vine will wrap around, adding length without too much verticality. Once the vine gets to the top, I can make another tube, lash it on with cable ties, and be good to go.

I used cable ties to connect the layers of mesh and sheet moss.

I had a roll of hardware cloth in the garage, and as I sketched and thought about it, I decided to make it like a quilt, with two layers of metal mesh that overlap in the center, leaving about 6 inches on either end, and a layer of sheet moss in the middle as batting. I stitched it together with cable ties. The humidity is supplied by a 1 liter pop bottle that sits on the shelf made of the inner layer of wire. I poked pin holes in the bottom. When I  fill it the water slowly drips down the tower, where it can evaporate.  In my first bottle, I poked too many holes, and the bottle drained in about 10 minutes. Ideally, it would be much slower. I have adjust the tightness of the screw top, so it slows it down, but it isn’t quite dialed in perfectly yet. The benefit to using a pop bottle is, I just have to check the recycle bin to get another one, poke fewer holes, and experiment.

I laid out about 12” of hardware cloth and cut it using wire cutters- I had to weigh it down so it would lie flat.

Lay out the green sheet moss- I got it wet so it would be easier to work with- I was outside on a windy day. I covered the bottom 18 inches of it but left the top bare.

Lay out the second piece of hardware cloth unevenly, so that the centers overlap, but there is about 6 inches on the bottom (this end will go into the flowerpot) and 6 inches on top (that’s where the water bottle will go.)

Quilt the layers together using cable ties. You could use wire for this, but I think it would be a pain- the hardware cloth wants to roll up, with cable ties you loop, then zip tight, and it goes pretty quickly. Usually my crazy frugality prevents me from buying something new for a project, but in this case, I went to the hardware store and bought cable ties- 2 dollars, and totally worth it.

The bottle fits into the top, and the bottom goes into the pot for stability.

Roll up the quilt, using a pop bottle to make it the right size- the bottle will rest on the shelf created by the inner layer of wire. Use more cable ties to connect the ends together, and maybe spin the tie ends to the inside. I forgot, and they look kind of terrible. I guess I could trim them…

Put the trellis into your pot- I used a 10” diameter clay pot, then filled it with orchid mix. This is when it would have been good to have a helper- the orchid mix is chunky, too chunky to fit through the holes in the mesh, so it would have helped to have another set of hands to stabilize it. I put the trellis in, filled in and around with orchid mix, then I put the plant in, and added orchid mix to fill in the rest of the way.

 The plant is only about 4 inches tall now- once there is no frost danger, I’ll put it outside on the patio and watch it grow.

Previous Older Entries