Beet Greens- you can grow that!


When C.L. Fornari, the genius garden blogger behind “You Can Grow That” suggested that for the month of February, we pick a plant related to the theme of love, I had to think about it.  I considered the plants I love, or the plants that symbolize romance, and I was kind of stumped.  February is a tough month for planting, around here anyway.  So, I decided to be contrarian, and write about beets.

We heart beet greens! Well, I do. Well, maybe I don't heart them, but I like them.

We heart beet greens! Well, I do. Well, maybe I don’t heart them, but I like them.

I have to confess that we don’t love beets at our house.  When we had a CSA membership, I tried to like them. I roasted them, which is my favorite with most veggies, and I threw them in stir-fry (which made everything weirdly pink) and I marinated them…not popular. I did learn that I liked beet greens, though. A friend insists that beet greens taste just like beets, but I disagree. Or maybe it’s the texture. Anyway, when I saw directions for forcing root crops in a pot, I thought to myself, that’s a good way to get greens without having to actually eat beets.

The directions come from Eliot Coleman’s Four Season Harvest, which is a funky combination of a book- part how-to garden tome, part we-went-to-the-south-of-France-and-drove-around-looking-at-gardens-in-winter travelogue. My kind of book, in other words.

Coleman describes  taking beets, or turnips, or celeriac, putting the roots in damp sand in a sunny window, and eating the greens that sprout.

I decided to start the experiment with beets. I bought a cute bunch, and cut off the leaves that they came with to sautee, then eat in garlic soup (really tasty- follow this link!)

I then filled a 6 inch pot 1/3 of the way with potting soil, then put in the roots, then covered with soil and watered.

BIrd's eye view of 3 beets in a pot, before another layer of soil is added.

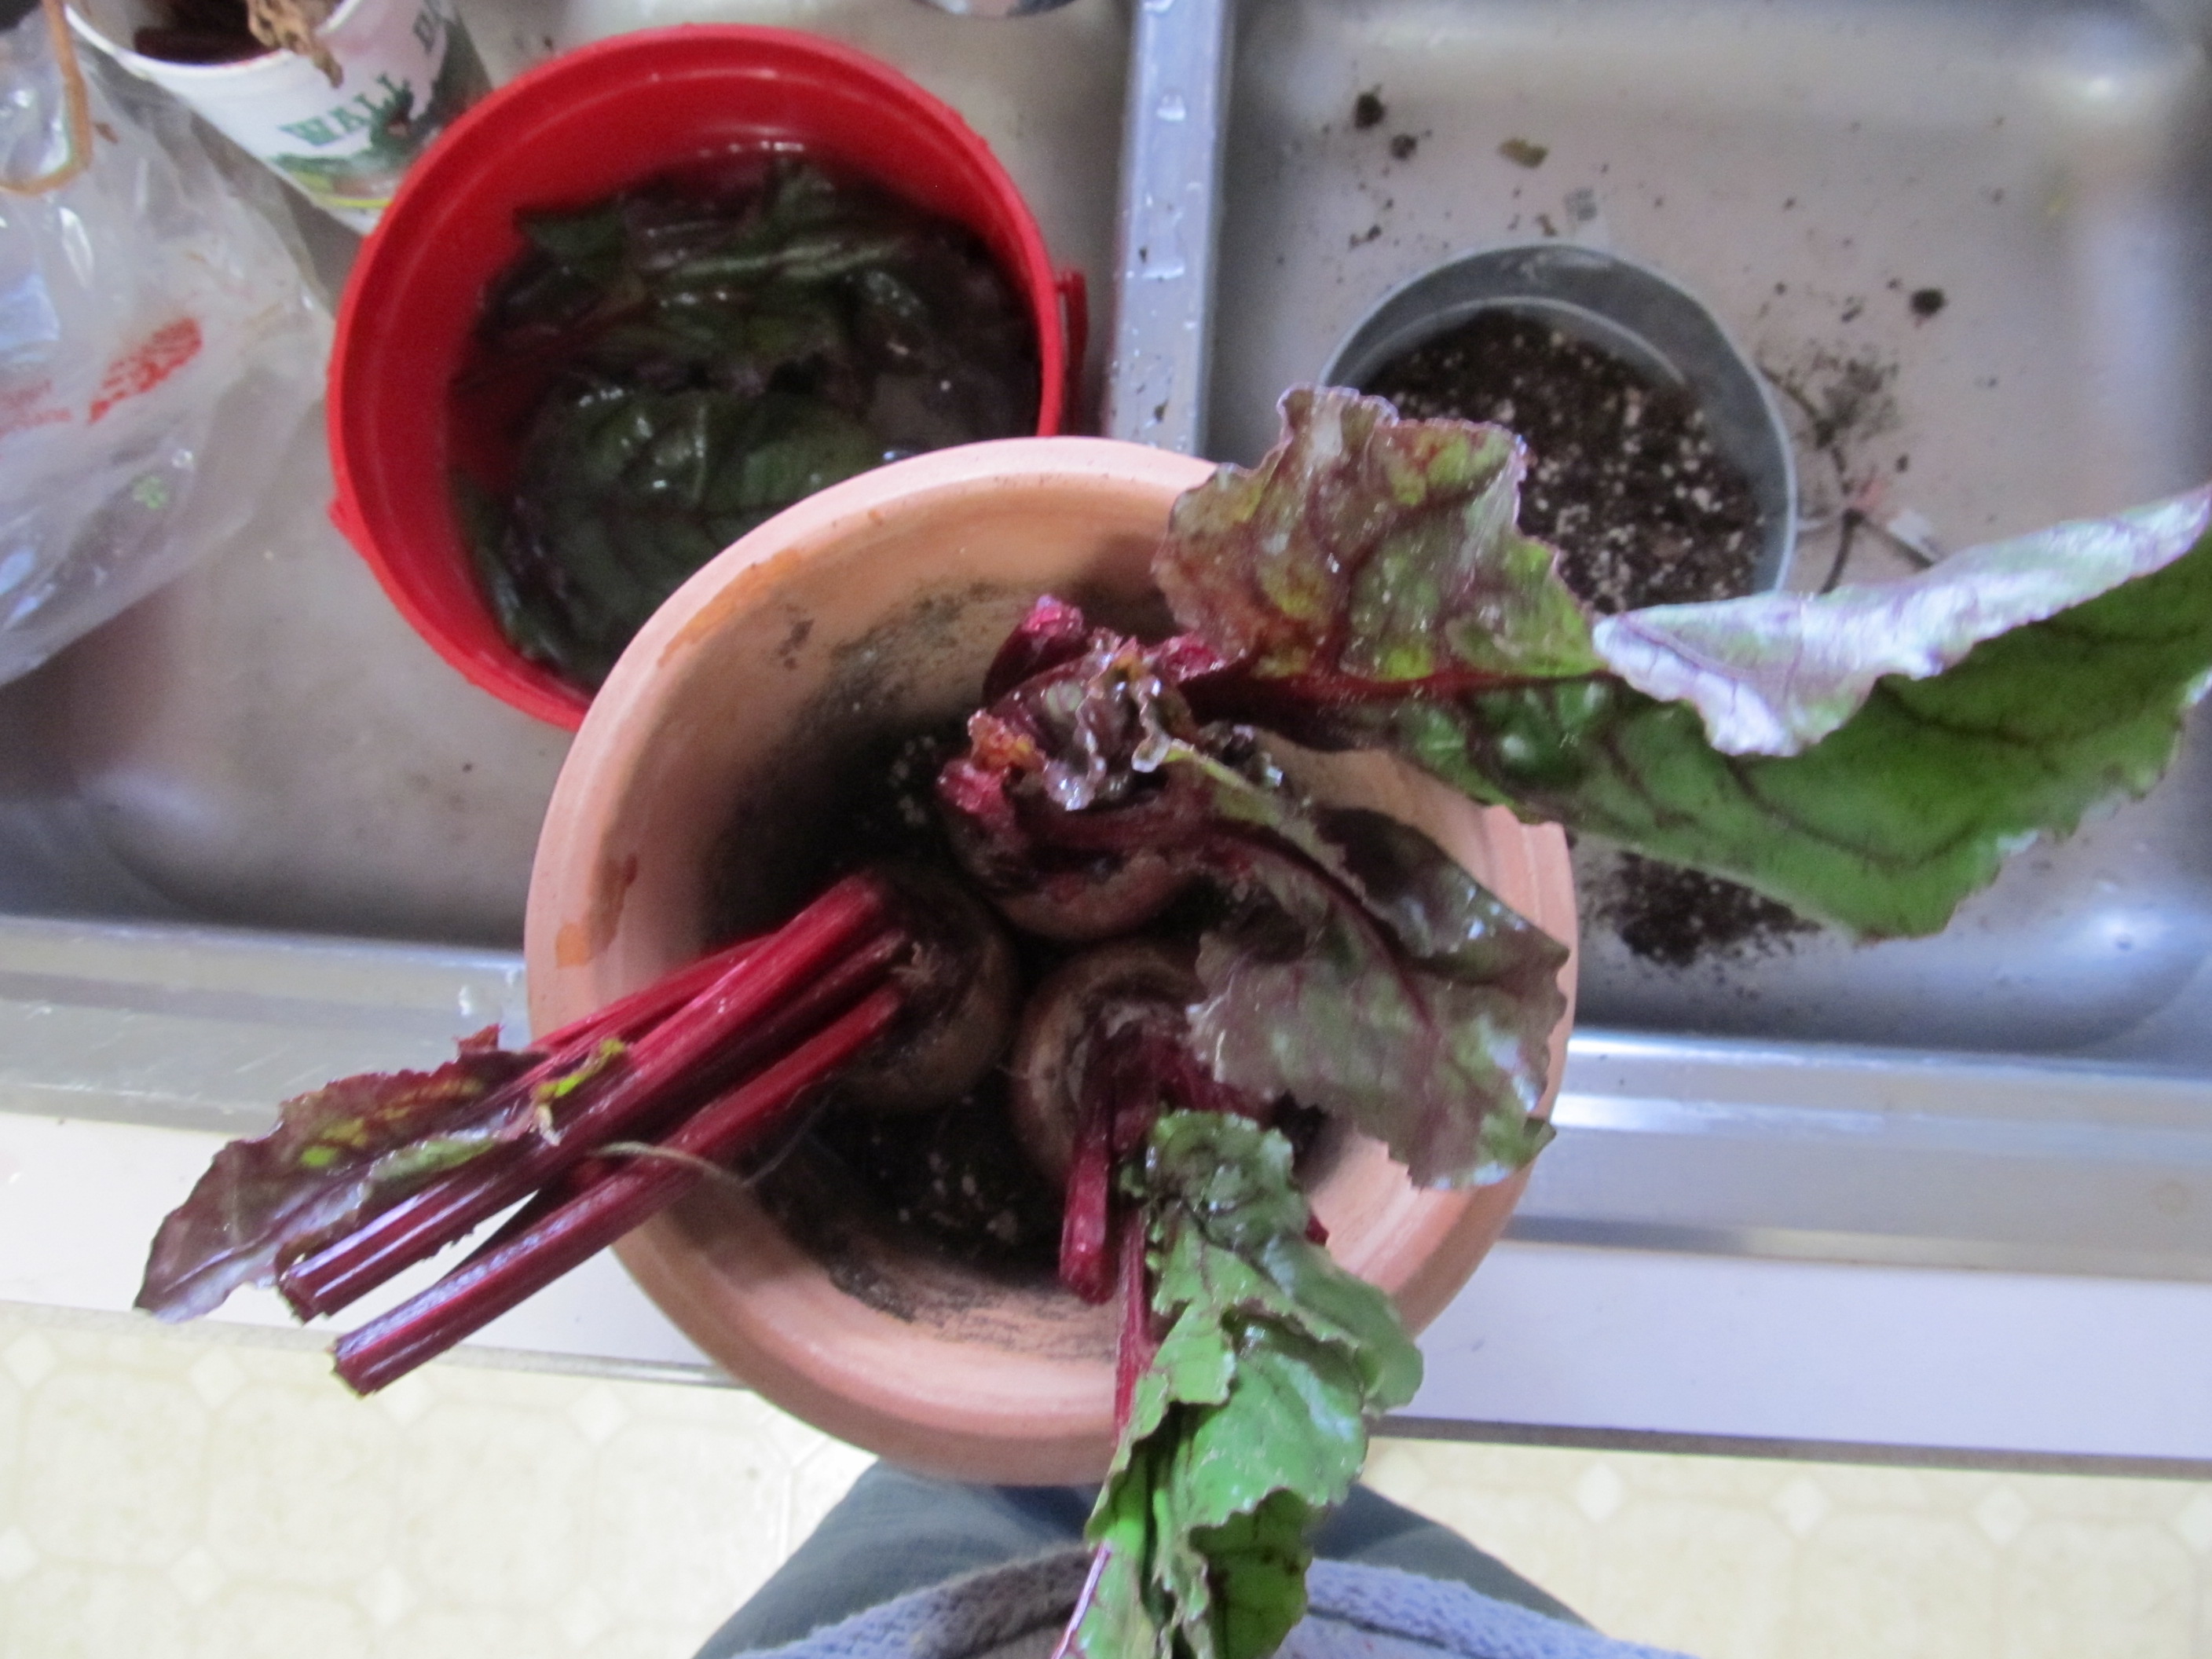
Bird’s eye view of 3 beets in a pot, before another layer of soil is added.

The roots won’t get any bigger- storage crops are biennial. During the first summer, they put energy into the root. When they send up leaves again, they use the energy store in the root to prepare for blooming. This means you don’t have to worry about leaving room in the pot for root growth.IMG_0056

We haven’t gotten enough for a big salad, but there should be leaves to add to stir-fry or soup or whatever.  I’m adding some to Quinoa salad tonight.  I hope it doesn’t turn weirdly pink.


Advertisement

Toad in the grass


Eggs and bacon, on top of spinach and greens. Squeeze of lemon, pop the yolks, mmmmmm

My college roommate introduced me to a dish called Toad in the Hole- a fried egg in a hole torn in a slice of bread. I don’t know how I grew to adulthood without knowing about this concept- combining eggs and toast in a happy little unit.

It has taken me another 20 years to find out about cooking an egg on a bed of sauteed greens- the same homeliness of the egg, with the virtuous feeling of eating a pile of spinach. I have been calling it Toad in the Grass, which I realize is a horrible name, but I have seen it elsewhere as “baked eggs” which seems like an even more horrible name.

This batch is made with spinach and beet greens from my garden (the beets were supposed to be micro greens, but I kind of forgot, and now they’re macro).

Saute the greens in olive oil and the water left on the leaves from washing them.

This is about two cups of mixed spinach and beet.

When the greens have reduced by about half, crack an egg or two on top. Cover and let cook until the eggs are mostly done. Then turn on the broiler and cook the gooey stuff on top. I added parmesan cheese this time, but I don’t always.

T

The eggs look kind of like eyes, maybe call it green monster? Another horrible name.

I also had 2 slices of pre-cooked bacon (you should cook bacon in the oven- it works really well) that I threw on top. Sooooo yummy.

Inside-out Self-watering Pot


This pot has onion sets in a double row around the terra cotta resevoir. A 4" pot with salad greens goes inside it.

A couple of years ago, I was doing research on building do-it-yourself self watering pots- where there is a resevoir of water on the bottom of the pot, and through capillary action, the water wicks up through the soil, keeping the pot evenly moist. there are numerous designs, Gardener’s supply company sells the Earthbox, and people have posted other designs. with rubbermaid tubs, or recycled recycle bins. The one thing they have in common is they are butt ugly. I have spent money on pretty blue ceramic pots, and I don’t want to uglify my yard…
I did pay for one liner, from gardener’s supply, and thought about making more with bowls, and mesh, and PVC pipe…the whole idea made me tired.

Then I saw these terra cotta vases at Hobby Lobby- about 6 inches across, 10 inches tall, no drainage hole in the bottom, but unglazed, so they are porous.  They hold about 2 liters of water.

I bought one to start, and put it in a 14 inch pot, and put geraniums into the pot. They did great. The soil stayed evenly moist, and I was able to put a smaller pot on top of the vase, too.  Roots dangled into the water from above, and water continually seeps through the pores of the terra cotta. If you pour a half gallon of water into the soil of a regular pot, most of it drains out the bottom, and you need to water again the next day. Under my conditions (arid west, bright sun, YMMV) I can fill the resevoirs once or twice a week.

I now have 3 or 4 of the vases- they aren’t great for everything, and they need to be covered with either a plant or a saucer so mosquitos don’t breed in the water. I have read about them being used in raised beds, also, but have never tried it. If your craft emporium doesn’t carry them, check thrift stores- I’ve seen terra cotta wine coolers every once in a while that would work pretty well, I think.

Zupa means soup


Last week I made some “Zupa Tuscana,” a complete ripoff of one of the soup choices from Olive Garden. For those of you not addicted to breadsticks, this is a potato and kale soup, with chunks of sausage. My home version was with homemade stock, and I actually went out and bought kale for it, something I swore never to do after having a glut of it two summers ago when our CSA would bring 2 or 3 bunches of it a week.
The soup was pretty good, got a thunbs up from DH, who is not usually a soup lover, unless that soup is called chili, and smothering a burrito. I decided to make it again, but make it less…soupy. I wanted it to have a mashed potato vibe… I believe there’s and English dish called bubble and squeak, which is mashed potatoes and cabbage (English food!? Too ethnic?) which I have read about, but never tried. The name is interesting, anyway.

 So, I peeled and sliced some potatoes, set them up to boil with boullion to cover.

For two potatoes, two cups of broth were about right.

I’m out of homemade stock, and Better than Boullion is a good substitute. If you’ve never tried it, do. The name is accurate, it is better than boullion.

I then sliced some kale into thin strips, and put it in when the potatoes were almost tender. After a week in the fridge, the kale was a little the worse for wear- what was too gross for the soup went into the compost bucket, with a little leaf for the hermit crabs. Once the potatoes were all the way tender, I  mashed them without draining off the broth. I added some pre-cooked  Italian sausage at this point. No photos of those- I tried, but they all came out weird. I usually fry up a batch of Italian sausages at one time, and put the extras in the freezer.  

 The texture of the soup is somewhere between soup and side dish- serve in a bowl rather than a plate. With unlimited breadsticks, if you have them…mmmm, wish I had unlimited breadsticks.

Mini Greenhouse Experiment


I bought Four-Season Harvest a few years ago hoping it would tell me how to have tomatoes in January. It doesn’t, but the author, Eliot Coleman, writes about growing greens in inexpensive hoop houses- basically PVC pipes covered in plastic sheets. So, I decided to plant a fall garden, with spinach, and mesclun greens, and kohlrabi, and they have looked lovely all fall. I didn’t put the plastic on, and few light snows didn’t faze them, when the snow melted, they bounced right back. We went away for Thanksgiving, and the weather prediction was for temps in the 20’s, and high winds. I put the plastic on, tucking it in, weighting it down with bricks and stones. Wasn’t enough, of course- I should have used duct tape… When we got back from Nebraska late last night, the plastic hadn’t blown all the way to Denver, but it had gotten loose, and the greens are fried. I’m sure the spinach, at least, will come back from the roots, but not until spring. The parsley looks undamaged, and the garlic will just hunker down and sprout again next spring. So, the lesson for me is to be more careful with attaching the plastic. I don’t think the problem was going out of town- I am pretty sure if I had seen and heard the plastic flapping around in 40 mile per hour winds, I would have just stayed inside and watched it.

Lows in the twenties make me feel like this, too.

I paid probably $10 for the PVC and a plastic dropcloth. Should have used staples and duct tape, too, though.