Putting the “we” into “weekend projects”


“So, if you were going to take out the swing set, would you dig out the legs first, or unscrew all the bolts first?” I ask.

DH thinks a minute and replies, “Oh, I’d undo the bolts, and then you could use leverage to get the bases out.”

“Oh.” I said. “What are you doing this weekend?”

He looks a little panicked. “It’s Easter?”

“No. Easter is next week.” It was inescapable- and he knew it- we didn’t do it right after the conversation, or on Easter weekend either, but before my walk this past Saturday, I looked him in the eye and said, “I really, really really want that thing gone, and I know I can’t do it by myself.”

So,  when I came home from my walk on Saturday to find DH in the back yard undoing the bolts on the swing set, I knew my begging had made an impression. I went to find my own set of pliers and get the kids off the couch.Image

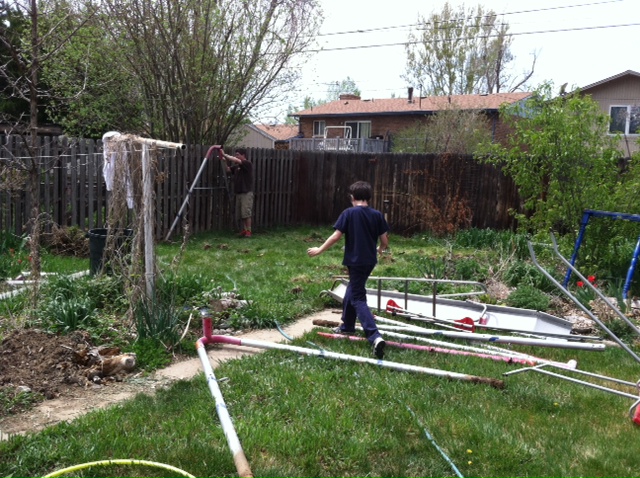
The swing set has been there since before we moved in, and is a magnet for wasps, but not a magnet for our kids anymore I had assumed it was set in concrete, because of the way it didn’t tip over when the big kids attempted to swing high enough to go over the bar (busted on Mythbusters, by the way). What we discovered on Saturday was extremely gratifying, though, no concrete, just stakes.

I set Will up with a shovel.  He complained.  “But I thought you liked digging holes…”

“When I was 5!”

Oh, yeah. I remember, we bought him his own little trowel, and he used to dig holes in the middle of the grass, looking for worms. Then we would step in them in the dark, and hurt ourselves and curse.  Good times.

So we dig around each of the posts, and find the loops on top of the stakes. At first we just try to unscrew them from the soil with brute force, then we break out our simple machine ingenuity. I get some short pieces of rebar to put through the loops to add leverage to untwist them. “Lefty loosey…” I keep muttering.

“Mom, I know it’s lefty loosey!”

Yeah, I know. I was just reminding myself. I get mixed up.

After less than an hour, with all of us helping, and really very minimal flopping on the ground in teen angst, we have the whole thing dismantled, and piled on the ground.

I’m sure in another 6 months, we can get it loaded into the pick-up and recycled.  Watch this space for planting schemes. The schemes include fruit.

Image

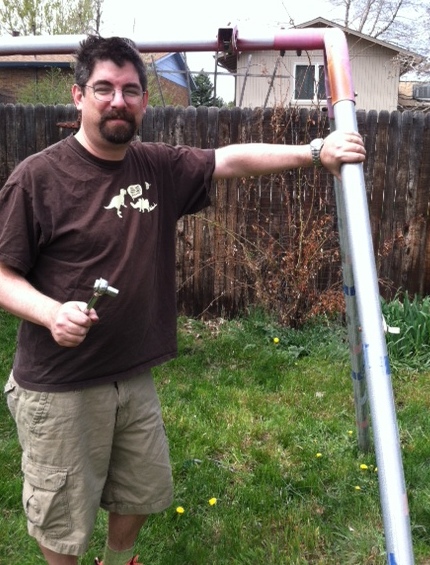
He has a ratchet, and he knows how to use it.


Advertisement

Demolition


Need some elbow grease to finish scraping off that mastic.

If  remodeling all starts with a throw pillow, or a pretty Martha Stewart towel rack,or paint colors, or choosing tile, there’s still a lot of stuff in the middle to get through, before any of the fun pretty stuff can get accomplished.

Our basement bathroom remodel started with a sluggish drain, and it is turning into a big deal. And we have kind of a deadline- I go back to school soon, and I will be teaching full time, rather than half, as I have been for the past several years. More money=nice, less time= not so nice.
The clock is ticking.
So, I ripped off the ceramic tile from the walls. At first I was dainty, sliding the scraper under the edge, prying gently, removing it with my other hand and placing it gently into the trash barrel.
Then it got fun. It was loose enough in most places that it would just pop off- whoever applied my tile so many years ago did it the same way they constructed the shower. That is, they did it  half-assedly. There was no grout, and I think it was mastic, rather than thin-set mortar. The mastic comes off the concrete foundation wall pretty easily, but not so much on the drywall. It’s pretty sloppy.

I used the gentlest tool first, and it worked really well- I read a lot of advice on the web that advocated crowbars and stuff, and implied that the best case scenario for most people was replacing the sheet rock. In our case, it popped off pretty easily.
The main tool I used was a scraper- it has removable 4 inch blades, and I found it in the tile section of the home improvement store.
If you are looking at this as a how-to, rather than just an opportunity to laugh at my hapless DIY skills, make sure you wear shoes, and gloves, and probably long pants, and definitely DEFINITELY DEFINITELY EYE PROTECTION. Seriously. There are tiny chips of ceramic flying around. Your eyes are what you see with. Protect them.

The next step was yanking out the dry wall from behind the shower wall. Rotten drywall. Pretty gross. I used a claw hammer to pull it up and break off pieces. About an hour by myself. I’m not complaining about doing it by myself- it is a 5×8 bathroom- I don’t think anyone else could get in there with a hammer without either taking longer, or someone getting hurt.

The next step is mental- the reason the drain was so sluggish was because the hole in the shower pan didn’t line up with the hole in the floor. I need to figure out how to “fur out” the wall so that the backer board can line up with the shower pan.

The book that has been super helpful is Stanley’s Complete Baths– I read it when we were up in the mountains last weekend.  My niece would say, “what are you reading?” and I would say, “shhh, I’m learning how to tile.”

So, we are working through the messy part, and soon will get through to the fun parts, expect more photos!

Holy Smokes- it worked!


Every picture should tell a story, right? This picture tells the story of the nasty stuff in my shower drain.

Our basement shower has been draining sloooowly for a long time, and when we had the plumber out to look at it, Dave was his name, wearing his cute little booties to protect our rugs, he just shook his head and said there was nothing he could do. Seriously?
We had already tried to snake it, but the problem was, the shower pan drain didn’t overlap with the floor drain- it was a little 3 dimensional Venn Diagram- this side was the water that came down in the shower, and this was the water that pooled up on the floor, and there in the middle, was the water that went down the drain. Gross.

We needed to do something, so I thought about remodeling. For a while. I set up a board on Pinterest, even.
After putting it off most of the summer, I tore out the shower pan last week, and tried the snake again. Not effective. Then I read somewhere that using a wet-dry vacuum would work.
Really? Okay.
It does work- I borrowed my friend Molly’s, and plugged it in, wrapped a rag around the end of the hose and turned it on.
At first, I wondered how you would be able to tell if it was working, then I felt little jerks on the hose, and looked inside the canister. Globs. Nasty globs of, let’s admit it, mostly my hair. And a piece of plastic that the installers had used to bridge the gap between the drain holes.
I poured an exploratory gallon or 2 of water down the drain, and it made contented gurgling sounds. Yea!
Next step, doing something about the decomposing wallboard behind the shower wall. Seriously? Who installed this thing?

Dead Junipers- what next?


The new edge of the bed in the front yard- we’ll be adding some compost and lots of mulch.

Most people who know me would agree, that I don’t seem like the kind of person who would pound stakes into the ground, stretch out string between them, and then follow that string as a guide when making the edge of a  garden bed. I was a s surprised as anyone when I found myself doing just that this afternoon.

Yesterday evening, I was cleaning up the edge of the area where we took out the junipers (link) and I used the garden hose to kind of make a gently curving, voluptuous edge, nipping it in close to the faucet, easing it out near the corner of the house.

Then I thought about mowing that line. I thought about all the other curvy, sensual edges in the yard that have to be mowed, then edged. I decided it would be easier to make a straight edge, and let the plants be curvy.

The bed is about 20 feet long, and the outer line is 8 feet out from the house wall.  (when I said I was going to make the bed about 8 feet deep, DH had a moment where he thought I meant 8 feet from current ground level to top of bed.  No.) I bought 40 brick pavers, because I didn’t want to get out the measuring tape and then do math, so of course I have to pay for my laziness with another trip to the big box store.


So, the plan:

buy more bricks

when there’s grass inside the line, pop it out and transplant it outside the line, when possible

pile on 2-4 inches of shredded wood mulch

when the weather cools, start transplanting the plants I want to move from the backyard

order bulbs

snake soaker hose around the bed

Plant list

Hazel bush (transplanted from nursery bed)

Sedum Autumn Joy (thanks, Sharon!)

Purple coneflower (divided from back yard)

Bearded Iris (divided from back yard)

Yarrow (divided from back yard)

Lamb’s Ear (divided from back yard)

Thyme (divided from back yard)

Comfrey (divided from back yard)

larkspur (seeds)

columbine (seeds)

lily (ordering- probably dark reds and oranges)

tulips (ordering, probably red and yellow triumph)

daffodil (basic yellow)

Most of these plants I already have, so this is a very cheap design for me. I also know they do well here, so I am not taking much risk that everything will keel over and die. The exposure is a little different- the north end of the bed is pretty shaded from the ash tree and the house, and the south end gets morning sun. The coneflower and lilies will go that direction, because they need the light to flower.  My “largish” plant is a hazel nut bush, and I want it to form one corner of a triangle with the ash and the Korean dwarf lilac under my window.

The plan for the tuteur- the exact measurements will depend on the wood I find.

I am also planning some structure- as you can see in the picture, there is a big expanse of plain wall, so I will put in at least one trellis, and some containers,  and am thinking about building some tutuers, which are french teepees- using lumber,rather than round wood or sticks. And, you know my policy, it should be done with the wood that is already piled up, going to the lumberyard is cheating! There are still some 1×2’s sitting behind the garage left over from taking down the playhouse, so I will start with those.

Fracking junipers*


I asked the tree trimmers who had worked for us before to come do an estimate of pruning the big old tree in back, the big old (slightly younger) tree in front, and ripping out the juniper bushes entirely. As I remember, when they came out last time, they pruned both ashes and the old apple, and removed an upright juniper, and the whole thing cost about $55o.

Umm… this estimate is higher. By a lot
$1600 for the ash in back, $600 for the ash in front. $450 to take out the junipers.
Seriously. $450 for the junipers?
I plan to get another estimate for the big trees, because this seems high. They did come highly recommended, and I was happy with the work they did before, and I am not going to climb up in my 50 year old ash tree and chop things up. But still. Cadillac prices.
I came to a conclusion in the shower, where I do my best thinking, and decided that for 450 I can rip out my own junipers.

Day 1  I started Saturday, tentatively at first, sitting in front with loppers, looking for the trunk, hoping I could just get in there and saw it down. Then I stood up and went around behind the northern-most bush, and saw that where the kids had tried to chop out a playhouse, it was pretty easy to access bigger branches. Lop lop lop, throw into a pile. After a while, I broke out the pruning saw, to get the branches that were too big to get with the lopper.
I discovered 3 wasp nests, unoccupied, and a bird nest, also unoccupied.

Little bird nest.

On the first afternoon, I got most of two shrubs cut up, waiting for the main trunk to be cut as close to the ground as possible. The temperature was about 75 degrees, not too bad for working outside, but my arms got scratched up, and I got dust and stuff in my eyes, even with safety glasses, and there were little pieces of prickly stuff everywhere. I kept thinking, “$450… $450”

DH suggested buying a chain saw when I was halfway into it. I may have growled at him.

.

Day 2 had record breaking temperatures. High temperatures, in case you are wondering. I loaded the pick-up, then discovered the waste yard was closed on Mondays. D’oh. Then I crawled into the house, and waited for it to cool off, investing the time in looking at wholesale bulb catalogs and drawing plans for the new bed. I also took a nap.

Day 3, the weather was cooler, but not by much. I drove the pick-up to the city waste yard, dumped the trimmings, then reloaded twice. The third time I stopped for iced coffee and a brownie, then stocked up on epsom salts.

Day 4: We sawed up the last of the shrubs, loaded up the truck, this time with help from DH, who didn’t have to go into work until late.

We also rented a small electric chainsaw. The stumps are just too big for the pruning saw. It cost about $40, and made the stumps go much more quickly.

Thank you Kate, for taking pictures…maybe we’ll have a conversation sometime about flattering angles.

I’m glad we rented, because safety equipment came with it. If we had bought a saw, I know we would have half-assed the safety part. Sure, I would have worn safety goggles, but the kit from the rental place had chaps, and goggles, and a hard hat with hearing protection.

I’m coming after you, stumpy!

At the end of day 4, the only thing left is clean up- the remaining stumps and branches, and sweeping.  The next time I get mulch, a thick layer will go onto this area, and when the weather cools in fall, I’ll transplant things into it.

My thought throughout this project was “We’re saving $450” every time I cussed, and complained, and found little tiny prickly juniper needles in my bra (in my bra!) I would think about the money I was saving. What is a project you could have hired out, but didn’t, or you did it yourself, but would never do it again? What would you do with $450?

*my original working title for this post was a different F word, which expressed how I was feeling toward the bushes. The boy saw it when I was working on it, and attempted to cover my eyes, to protect me. He thought someone bad on the internet had written that word, and he wanted to protect me, bless his heart.

Checked off to do list: back window


Once you cut a groove into it, the acrylic becomes pretty easy to snap. The directions say use your thumbs, but it was easier on my hands to bite off chunks with my Vise-grips.

Armed with my new dollar store tape measure, I decided to tackle a project that had been marinating for a long time. A few years ago during a wind storm, the door that leads from the garage to the back yard slammed shut and the glass broke.  I cleaned up the broken glass pretty much immediately- I had little kids crawling around, after all (ooh, the fact that I say they were crawling around makes it seem like this window has been broken for more than a “few” years…) So, cleaned up the glass, scraped out the putty, bought a sheet of acrylic to replace the glass, and a handy dandy little tool for cutting the acrylic and then…waited. Procrastinated. Can’t explain why- once the glass was cleaned up it didn’t seem urgent anymore, and I thought it would take a long time.

Well, it didn’t. Not really.

We had a beautiful sunny afternoon when I didn’t really have anything else to do, so I got out the tape measure and measured. Once.

You can probably see where this is going.

I laid out the acrylic, measured out my lines, and clamped a metal straight-edge down. The special acrylic cutting tool calls for cutting along the line until the groove is 1/16th on an inch deep. The sound drove the neighbor’s dog crazy- this high pitched squeal that had to be repeated many many times. There might be an easier way to cut plastic- I honestly didn’t do much research about it.

Once I got it scored and snapped, I took it over the the window opening, and discovered it was 1/2 inch too big.

It was a nice sunny day, though. DH and the kids were on a bike ride, and I had no where to be, really, other than enjoying the sunshine in my backyard, so, I measured again, marked it clamped it and cut it.  This time it was just right. I popped it into the frame, popped it out, put in some caulk and nailed the trim back on.

Look, now the shiny window reflects the mess in the yard... I'll get right on that.

One project down…

The Lost Tape Measure


In my quest to become handy, I have made a list of projects, many that have been simmering for a while, and I have thought about first steps.For several, the first step would be: “measure the opening.”
Yeah. About that.
I do have a battery operated, automatically retractable measuring tape. Which I have misplaced. I think it is in the garage?
I have another 25′ one, my favorite, which I have accused the Boy of losing.
The Boy likes to measure stuff- when he was littler, we would read animal encyclopedias together, and it was worlds different from reading with the Girl. With her, we would snuggle with a story, and predict what might happen, and find the rhyming words, and talk about the characters. With the Boy, we would read a little fact box next to a picture of say, a Siberian tiger. Then he would hop off my lap, hand me one end of the measuring tape and walk backward until he got to however many feet. The Siberian tiger sticks in my memory, because it was too big for the living room. This isn’t a technique they taught me in teacher school, the kid just came up with it on his own.

Obviously too big for the living room. Photo from Tiger-pictures.net

That year at Christmas, he asked for a 100′ measuring tape. I asked him what he would measure with it, and he answered, “mostly blue whales.”
Oh. I see.
We didn’t get him one, and I wish we had, because then maybe mine wouldn’t be in a snowbank, or in the bottom of a toybox, or who knows where. We looked in all the usual places.
So, the last time I was at the dollar store, I went ahead and bought a new measuring tape, so that I can measure stuff so that I can work on the projects on my list.
And then wouldn’t you know it, when I opened up the junk drawer in the kitchen, there was my favorite measuring tape. Put away. It’s not really where it goes, but it was put away…

The Bathroom Remodel?


I vividly  remember reading this book when I was a kid about a man who buys new shoe strings, then sees how shabby his shoes look in comparison. So, he gets new shoes. Then his suit looks terrible. So he buys new clothes, and gets into his shabby car to drive home, and winds up buying a new car, and a new house. Maybe a new wife- I don’t remember the ending. Anyway, he changes his whole life because of one tiny thing.

That is what I am afraid of with our basement bathroom.

It is terrible.

I took the curtains down to wash, and realized the window frames are corroding there in the wall. In scrubbing the mold off the walls, I have scrubbed the paint off, but repainting means making a decision about the pink tiles that are popping off the walls, and the floor tile that is peeling up. And the shower stall. And the basin- actually, the basin isn’t so bad.

Last week, the drain got clogged, and water started leaking out of We started showering upstairs, where the pressure is terrible.


The curtains were the “new shoe strings” in this little parable, but beyond new shoe strings, the bathroom really does need work… a lot of work.

People with bathroom remodel experience- what’s next? How much can I do myself? What resources should I go to? Does anyone else remember that book, or what it is called?

Becoming Handy


I’ve been crafty, now I want to become handy- I have a list, and some goals… I’m working on it.

There are a lot of little things on the list, like the drain plug lifter handle on both basins in the main bathroom. Then there are big things, like the gutters that still drip and the squirrels in the attic. Maybe we should outsource the squirrels. They frighten me.

My first step when learning new things is always getting books about it. I am not a person who can jump in and try something without endless research first.

I hit the library for some home improvement books, and found a strange mixture-a  memoir about moving a cottage to be an addition to a house on Cape Cod, a collection of tips and tricks culled from the pages of Fine Homebuilding magazine, and a book about home repair for cheaters. They are now overdue at the library, and I still haven’t fixed anything. Sigh. Being handy is harder than I thought.

This is the toilet that still runs. Sigh...

Exercising Willpower


I learned recently about the idea of will being like a muscle that needs to be exercised in order to be strong. I guess before I thought it was like a talent, something some people are born with, like mechanical aptitude, or great hair. but two things have changed my mind about this: I read in a yoga magazine about the idea that the front of your body embodies desire, and the back embodies will. Both sets of muscles must be strong, and will must follow desire. Strong belly, strong back, strong back, strong belly.

Is desire stronger for a lot of us? So many people tell me, “I wish I spoke Spanish,” and I have to tell them that wishing isn’t enough, they have to do it. The same goes for learning to knit, or play music, or anything you desire- the will to do it has to follow.
The other thought I have had about willpower is that most of us try for willpower on the big things in life- quitting smoking, or changing our diet, rather than exercising our willpower on little things for practice. Is there anything bigger than changing your diet? We all try, at one time or another, then discover it’s too big, and blame ourselves for lack of willpower.
I have been training myself-  putting post-it notes on my computer that remind me to do things.  Simple things, mostly- like “stretch” or “menu plan.” As I do them, I feel this satisfaction that I am exercising my will. Yeah, there are benefits to stretching, and to planning out a menu once a week, but the other benefit is that I am doing something simply because I will it.
I have also gotten in the habit of cleaning the kitchen sink every night before I go to bed- no dishes to soak, no goopy pans. Most nights, it is a pain, but most mornings, it is a joy to have a clean sink. I will it to be so!
We have an older house, and there are a lot of little things wrong with it, that I have desired to have fixed, but haven’t had the will to follow through on. So, now that my will is stronger, I have started to work on home projects- not crafty ones, but things that can be defined as “handy.” Things that involve caulk, and levels, and maybe the rental of a heat gun. Projects that I have “desired” to be done, but until now, haven’t had the will to do myself. These are projects that I want to accomplish, that I will accomplish. (slowly, and with plenty of mistakes, I’m sure- watch this space)
So, what do you do to exercise your will? Not resolutions, but things that you desire, and are willing into existence?