Larkspur- you can grow that


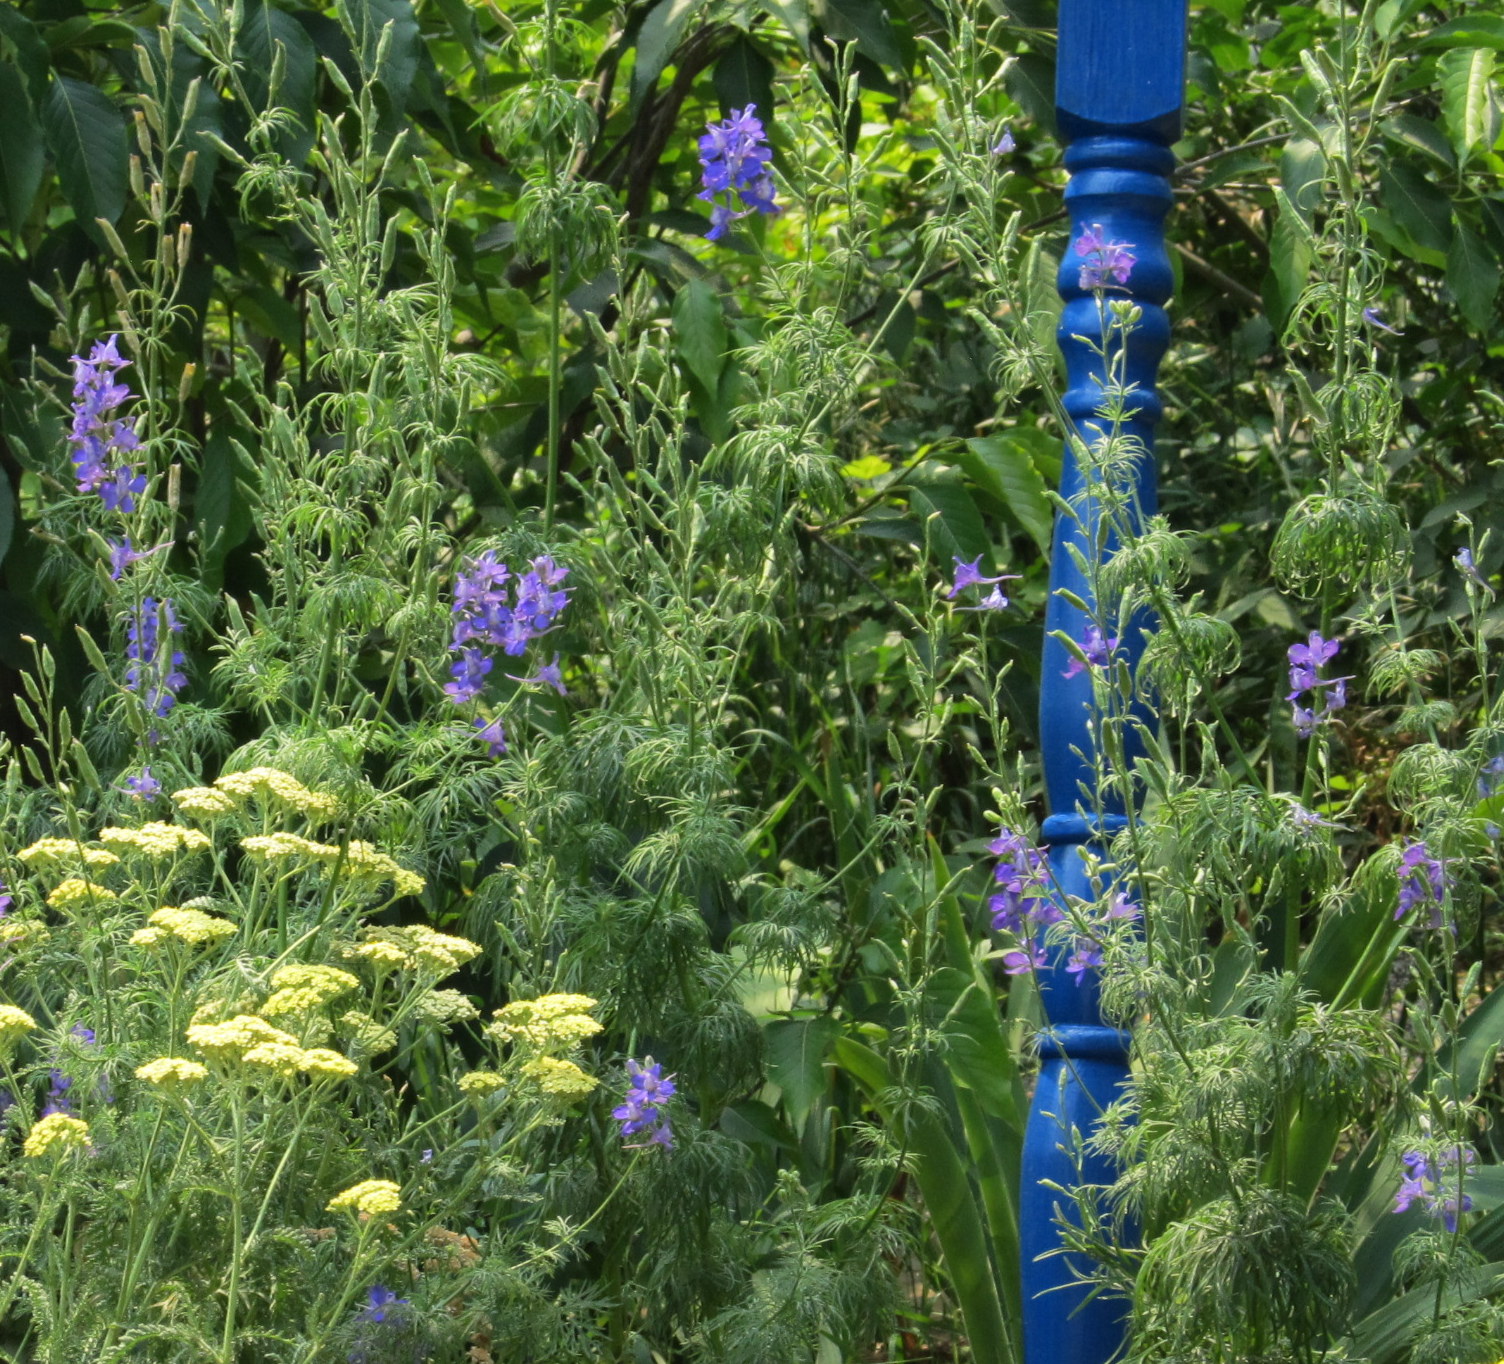
Larkspur and yellow yarrow last July.

When I was first building my  garden, my wonderful mother-in-law gave me an envelope of larkspur seeds.  I had the hardest time remembering what they were- I’m not sure why the name didn’t stick with me- those, thingies… bird feet thingies…I would think in my head. I finally have them down, and I have them essentially everywhere. Love them: water efficient, good for pollinators, tall, that pretty blue that flowers don’t usually come in. Pretty cottage garden-y stuff, without needing much water.

They are not perennial, that is, the same plant does not come back year after year, like peonies or rhubarb. Instead, they drop their seeds nearby and plant themselves. I help them along by cutting them back and sprinkling their seeds where I want them.

It is a good thing I am not a super control freak, because often “they drop their seeds nearby” means in the path, or along the edge of the bed, or mixed in with the asparagus.  I have wide beds, with lots of shrubs which were tiny when I first planted them.  Back when my MIL gave me the envelope, the larkspur helped it look like the wide “mixed shrub borders” were something other than wide “expanses of mulch with twigs sticking up.” Now that 8 or 9 years have passed, and the shrubs have grown up, the larkspur can seed itself in the handful of gaps that remain.

To have your own spot of cottage garden-y goodness this summer, don’t wait until someone gives you an envelope of seeds from their yard. Instead, buy a pack, prepare a bed, sprinkle the  seeds and water them in. My self-seeded plants are already up, after having spent the winter on the ground, so it is not too early to plant them.  The first grown will be soft and ferny, and the flowers will grow to be 2-3 feet tall.

You can grow that

Larkspur, yarrow and chamomile blooming way back last summer.

Larkspur, yarrow and chamomile blooming way back last summer.

is an initiative by garden writer C.L. Fornari, to encourage people to get out in the sunshine and grow stuff. You should check it out.

Water Lily Transplant Team


At the pizza place last night, I told my kids I was planning on taking the water lily out of the pond to repot, and asked if they would help. They did not respond enthusiastically.
I clarified by saying I wanted to blog about it, so I would need photos.  I won’t say they were eager…the only eagerness came from each not wanting the other to get to use the camera. Oh well, I’ll take any assistance I can get.
To prep, I checked my pond reference book “The Pond Doctor” which has enough illustrations to be useful, but not so many that it counts as a coffee table book. The directions for repotting recommend lining a basket with burlap, then adding clay soil, then removing the lily from the pond, rinsing the old soil off, cutting off any dead material, and placing the rhizome at a 45 degree angle with the growing tip at the center, then covering with gravel, then placing it back in the pond in shallow water, until it starts growing. Whew. That seems doable.

The water on top is warmer than in the depths of the horse trough, but not by much right now. My “shallow water” zone is a couple of cinder blocks I placed at the south end of the trough, one vertical and the other horizontal. They make a stand for plants, and the holes create happy little hiding places for the fish.
Step 1 Basket: I got a basket at the dollar store. It cost a dollar… I ran into a preschool mommy- Someone I hadn’t talked to since we stood around waiting to pick up our kids, 5 years ago. We had a nice discussion about what size basket I should get for the water lily. Actually, we talked mostly about how big the kids were getting, and our conclusion about the water lily was that I might as well get 2 sizes of basket, since they were only a dollar.

Step 2 Burlap: I bought a yard at the hobby store, which is conveniently in the same mini mall as the dollar store. I cut it in half and crisscrossed it in the basket.

We used the bigger basket- the recently fished out lily is in the smaller one.

We used the bigger basket- the recently fished out lily is in the smaller one.

Step 3 Clay soil:   easy to find, in theory, since my yard is nothing but clay. I found an inconspicuous spot to dig a bucket full.

Step 4 Remove lily: When I fished the lily out of the pond, I was surprised at the size. I bought it two years ago in a mesh bag the size you might buy garlic in. There wasn’t any soil in the bag originally, I don’t think, just some gravel to make it sink, which made

Step 5 Rinse soil off rhizome  very easy. I cut away most of the mesh, and

Step 6 Trim: I cut away the mucky stems and leaves from last summer.  Kate was appalled by the smell. She is the one who won the “I get to take pictures” argument.  Honestly, it wasn’t that bad- if pond smell is the only thing keeping you from repotting a water plant, get over it.

Extreme close-up of fresh growth.

Extreme close-up of fresh growth.

Step 7 45 degree angle:  I nestled the rhizome into the soil at an angle, leaving the growing tip out of the soil in the center of the basket.Then I wrapped the lose ends of the burlap up around the soil on top.

Step 8 Gravel: I know I have a bucket of gravel around somewhere- I am sure it will turn up in the spring cleanup. When I find it, I will put some scoops of it on top of the burlap, to keep the soil from making the water cloudy.   That’s a little joke- the water is pretty cloudy on its own right now.

Next fall, I'm going to put some kind of a screen on top so we don't get a tree's worth of leaves in the pond. It's pretty darn gross.

Next fall, I’m going to put some kind of a screen on top so we don’t get a tree’s worth of leaves in the pond. It’s pretty darn gross.

Step 9 Shallow water: I placed the basket on one of the cinder blocks very gently. Some bubbles came up from the burlap, but fortunately the soil was pretty moist already. If it had been dry, I would have had to hold the bundle down until the air bubbles had all come up out of the soil, and it was fully moistened.

Step 10 Scrub arms: Okay, Kate, you’re right, it is pretty stinky, and my right arm, which is the one that went into the water to get the plant, is pretty gross smelling.

Science Fair- please, no wagering


“When is your science fair?” I asked the Boy one cool evening not long ago.

“I don’t know…” he responds.
Ooops. Hope it isn’t tomorrow, because we aren’t ready.
The Boy is a self proclaimed nerd, and loves science. He is memorizing the periodic table of elements (hint, if he asks you if you want to hear him say the first 37 elements, insist that he sing them. He’ll blush, but he’ll do it!)
He loves weather, and nature, and dinosaurs, and is getting into chemistry, and so there is a lot of pressure to have a really amazing science fair project. Pressure from his peers, but also from himself.
The problem is, we are pretty bad about follow through around here…
We brainstorm, and come up with things…then we get distracted by something shiny.

It turned out that the Science fair was a few weeks away, so we had time to follow through.
So,  the decision for this year was to examine the life growing in the jar of pond water we collected last summer . The 1 quart jar has been in his west-facing window, growing algae and stuff.

Look- follow through! With a map and a video and everything!

Look- follow through! With a map and a video and everything!

When we first collected the samples, we didn’t intend to make it a science fair project. I had read about the project in a garden book, and when I told the Boy about it, he thought it was a neat idea, and nagged me about it until I got a jar, and went with him to the park.

This made the “research question” portion of the science packet problematic… we couldn’t just say the question  was: “wouldn’t it be cool if we had a jar with pond water…?”

So, the research question became: “Can an ecosystem be formed by mixing materials from different sources?”
We took a video of the little critters that are swimming around, and looked at them with our thrift store microscope. With help from the interwebs, he determined that they were daphnia.

The science fair was a success- there was the usual supply of baking soda volcanoes, and several decomposition displays.  The Boy was the only one to have a jar of tiny critters with a water cycle. Our school fair is non-competitive- just an exhibition, not a competition.

This was on someone else's display. Now, I don't know Tyler or Jack H., but I am pretty sure they touched it.

This was on someone else’s display. Now, I don’t know Tyler or Jack H., but I am pretty sure they touched it.

Now we have to think about next year.

You can grow that- locally!


All politics is local, they say, and gardening is the same way. I have driven myself crazy for years reading books about organic gardening in Pennsylvania, or Upstate New York, or Maine, or Wales. I have tried to apply my learning to the ground here- dry, clay, and alkaline. I have finally learned to read Western-based garden books, or to temper my fantasies to something that is sustainable with the soil here, and the amount of rainfall here.

Every winter I am inundated with seed and plant catalogs. I read them, and place sticky notes, and highlight the varieties I want to buy. It is similar to the garden book thing- catalogs from Maine, or Oregon, or Pennsylvania won’t necessarily have what I need here- drought tolerant in Massachusetts is different from drought tolerant in Colorado.  Full sun in Michigan is different from full sun here.

This year, rather than placing an order to have seeds shipped to me, I will bike downtown, and go into our local greenhouse, where they order seeds in bulk, and will sell me little envelopes of whatever I want to plant. Well, not “whatever” …last year they didn’t have leeks in bulk, so I got a pre-packaged envelope off the rack, but they have many popular varieties that do well here. They have bareroot strawberries and asparagus and seed potatoes and onion sets. They also have people working there who, if they are not experts, they are informed, about where things are located in the store, and when to plant most things.

Your homework- find a greenhouse or garden center that is local to you. Locally owned businesses will only stay alive as long as we support them, and often the guys in the *cough orange aprons cough* don’t know much about the plants they are selling. You don’t have to bike (and in fact, I might not, but I should) but find a place that is local, and support it.

The lonely pile of seed catalogs this year- I am forsaking you for a local business.

The lonely pile of seed catalogs this year- I am forsaking you for a local business.

C.L. Fornari, amazing garden writer, has founded “You can grow that!” where on the fourth of every month, garden bloggers write posts encouraging anyone to grow anything.  Check her out at http://www.youcangrowthat.com/

Chris Kimball comes through again!


Because of a need to go lower fat, I was looking to substitute the foods we love with lower fat versions.

Spaghetti and meatballs is a meal we have in the rotation regularly-for years I have just been buying a bag of frozen meatballs, and microwaving a dozen or so while the pasta water boiled.  Then I read the label, and was astonished by the amount of fat.  This was low-hanging fruit- surely I could make meatballs with less than 12 grams per serving!

I borrowed a low fat cookbook from a colleague, and made calculations and adaptations for a meatloaf recipe. I was so proud- it was only 1.5 grams of fat for an entire serving of 6 meatballs. I used texturized vegetable protein, and 95% lean ground beef, and…Ummm…yeah. They were….really…I should have taken pictures of people eating them- glum. We did eat the whole batch, but not happily.
The thing is, the good people at Cook’s Illustrated/America’s Test Kitchens have done the math, and done the experimentation, and come up with a recipe for meatballs that aren’t as crazy lean as my experimental meatballs, but they are really tasty.
Because that is the thing- at only 1.5 grams of fat per serving, no one wanted to eat them. So, what’s the point?
The two secrets of CI’s recipe are buttermilk and gelatin. The buttermilk totally makes sense to me- tang and richness and mouthfeel. The gelatin was a surprise- they explained that sometimes meatballs are made with veal, which I guess naturally has more gelatin, so you get a creamy texture. It gives a velvety feeling without being greasy.
I tried them, and they are so good. The original recipe called for 2 pounds of beef, and 1 of ground pork. I didn’t want that many meatballs floating around the first time I made the recipe, so I used just 1 pound of 93% lean beef. Another modification was to use leftover Christmas ham rather than the finely chopped prosciutto called for in the original. This was pure laziness- we had the ham, didn’t want to go out for specialty deli meats.  I think the ham also adds saltiness and umami, without adding fat.  The original recipe would make around 120 meatballs, which seems like really a lot- more than my oven could handle, but I suppose if I were having a big spaghetti party, I might make that many.

(Weird note about Cook’s Illustrated/ America’s Test Kitchen- I had a dream that Chris Kimball lived in our town, and all his quirky small town New England stories were really about here, and he was giving cooking classes and we went and he wore his little bow tie and everything.)

Meatballs- based on Cook’s Illustrated, with adaptations

3/4 cups bread crumbs

1/2 cup buttermilk

1/4 cup egg beaters

1 pound 93% lean ground meat

2 oz chopped ham

1/2 cup parmesan cheese

2 teaspoons italian seasoning

1 clove pressed garlic

1 packet unflavored gelatin dissolved in 2 tablespoons water

Dissolve the gelatin in water according to directions. In a large bowl, mix the buttermilk, egg and the breadcrumbs. Add the other ingredients, and mix together by hand, thoroughly incorporating the gelatin.  Form into balls- you could weigh them…I guestimated and came up with about 40 of them that seemed about the right size. Place on a baking sheet and bake in a 350 degree oven for about 20 minutes.  At this point, you can bag them and put them in the freezer, or simmer some in sauce until the pasta is ready, and freeze the rest, or maybe you are having a big enough party, or you have a big enough family, to serve all of them at once.  Go for it.

Sorry, no photos…every time I cook something, I find myself admiring the photographers who take pictures of food. My photo shot of this recipe just turned up pink pasty stuff, then, you know, brown balls…of meat…

Self watering pot- a goldfish story.


Frozen Hillbilly Goldfish Pond.

Frozen Hillbilly Goldfish Pond.

I pinned something on Pinterest that was repinned more times than anything else I have put up. Then, my brother found it somewhere and sent it to me, as well.  It is a tutorial for a mini pond in a pot, with divisions for a wetland area with more soil and cattails, and a pond area, with a water lily. It is honestly adorable.

I have worked my way up in mini-ponds- from a 10 gallon tub, to a 20 gallon half barrel, to my current one, a 100 gallon horse trough, aka the Hillbilly Goldfish Pond. I have learned that the more water, the better the pond works. The fish like it better, (although there is some…attrition). The plants like it better. This experience tells me that the little patio pond depicted probably wouldn’t work, but it is adorable. People like adorable.
It makes me think, though, about adding more “wetland” area to my pond. And with that, it makes me wonder about combining the idea of a self watering pot and my pond. A self watering pot is a porous pot  with a reservoir underneath that holds a constant source of water. Roots are always able to access the water they need, so they tend to grow better than they would in regular containers. Earthbox is one brand. They seem expensive and  ugly. (that’s one way you can tell I don’t make money from these links.   If they were affiliate links, I would say, “kind of expensive, and kind of ugly.”)

In a six foot long pond, what about putting in some cinderblocks, and some pots that would keep the roots wet, but the tops dry, so the plants don’t rot? Or islands, out of floating styrofoam, for lettuce and spinach? Or grow bags with squash, and the vines could drape over the sides of the trough? I would still want enough open space for fish, and I wonder if the goldfish would wind up eating the roots?
That’s what’s great about winter- I can imagine these ideas all day and night, waiting for the pond to thaw.

Beet Greens- you can grow that!


When C.L. Fornari, the genius garden blogger behind “You Can Grow That” suggested that for the month of February, we pick a plant related to the theme of love, I had to think about it.  I considered the plants I love, or the plants that symbolize romance, and I was kind of stumped.  February is a tough month for planting, around here anyway.  So, I decided to be contrarian, and write about beets.

We heart beet greens! Well, I do. Well, maybe I don't heart them, but I like them.

We heart beet greens! Well, I do. Well, maybe I don’t heart them, but I like them.

I have to confess that we don’t love beets at our house.  When we had a CSA membership, I tried to like them. I roasted them, which is my favorite with most veggies, and I threw them in stir-fry (which made everything weirdly pink) and I marinated them…not popular. I did learn that I liked beet greens, though. A friend insists that beet greens taste just like beets, but I disagree. Or maybe it’s the texture. Anyway, when I saw directions for forcing root crops in a pot, I thought to myself, that’s a good way to get greens without having to actually eat beets.

The directions come from Eliot Coleman’s Four Season Harvest, which is a funky combination of a book- part how-to garden tome, part we-went-to-the-south-of-France-and-drove-around-looking-at-gardens-in-winter travelogue. My kind of book, in other words.

Coleman describes  taking beets, or turnips, or celeriac, putting the roots in damp sand in a sunny window, and eating the greens that sprout.

I decided to start the experiment with beets. I bought a cute bunch, and cut off the leaves that they came with to sautee, then eat in garlic soup (really tasty- follow this link!)

I then filled a 6 inch pot 1/3 of the way with potting soil, then put in the roots, then covered with soil and watered.

BIrd's eye view of 3 beets in a pot, before another layer of soil is added.

Bird’s eye view of 3 beets in a pot, before another layer of soil is added.

The roots won’t get any bigger- storage crops are biennial. During the first summer, they put energy into the root. When they send up leaves again, they use the energy store in the root to prepare for blooming. This means you don’t have to worry about leaving room in the pot for root growth.IMG_0056

We haven’t gotten enough for a big salad, but there should be leaves to add to stir-fry or soup or whatever.  I’m adding some to Quinoa salad tonight.  I hope it doesn’t turn weirdly pink.


Seriously. Good. Guacamole.


So, for each avocado, about this much sauce- I know it says 1/2 teaspoon, but this is the kind of spoon we use, and it's just on the edge...

So, for each avocado, about this much sauce- I know it says 1/2 teaspoon, but this is the kind of spoon we use, and it’s just on the edge…

Just in time for some sort of big game that may or may not be happening this weekend, the Associated Press put out a food feature on guacamole. They suggest adding bacon and brown sugar. Seriously? A 12 ounce jar of roasted red peppers? Bleah.
DH has developed the sine qua non (wait, is that what I mean? something Latin, anyway) of Guacamole. He invested many years of experimentation into it, and every batch has been worth it. I say that as his primary taste tester. When he dared to show up at a New Year’s Eve party without a bowl of his signature guac, he was sent home. I was like- “look, I made homemade marshmallows?” No, not enough. DH went home and returned later with a bowl that was gobbled up immediately.
We can eat guac guilt-free around here, because even though it is high fat, Kate doesn’t like it, so we don’t have to worry much about her pancreas. Or her puppy eyes- whenever she catches me having something she wishes she could have, she looks unutterably sad….
So, I will share with the world (well, the world of my little corner of the interwebs) the recipe so that you won’t have to use any weirdo AP recipes. Seriously, they want you to add mango?

The secret ingredient is rooster sauce. Also known as Sriracha, which is chile puree found in the Asian section of your grocery. Get the kind with chilies and garlic. DH has been know to play Johnny Appleseed with rooster sauce, bringing guacamole ingredients to the homes of friends and relatives, making a batch of guac and leaving the jar of sriracha there.
This is a proportional recipe- you can expand as much as you like, but you can’t contract it much beyond 1 avocado- I guess you could make it with half an avocado, but then you have a half of an avocado left that you know would be better as guacamole.
1 ripe avocado
1/2 teaspoon chili garlic paste
1 teaspoon lime juice (bottled is fine, unless you have limes lying around)
1 tablespoon of chopped purple onion
Mash avocado in a bowl,add remaining ingredients. Taste test. Remember, you can add more lime,chili and onion, but you can’t really take it away. It should taste balanced. You should feel blissful.

I realize that there may be people who are unfamiliar with guacamole- it is a puree of avocado, used as a topping on tacos or other Mexican dishes, or as a dip eaten with corn chips.

Progress on the Duvet Cover


The previous owners of our house finished the basement in idiosyncratic ways- for example, when they installed the basement shower, the drain holes didn’t line up. That’s bad. They also put in a storage system in the playroom with a sewing closet. Open the doors, and there is a desk with a rectangular cut-out for a sewing machine, and little drawers for scissors and bobbins and ribbons and things. That’s good.
The result is that I can leave projects half finished and come back later, without having to clean off a table to sew.
The bad thing is that it is in the basement, which is cold and dark in the winter. In summer, it is great, because when it gets unbearable upstairs in the afternoons, we can go down and play with legos and sew. In the winter, I don’t get much sewing done.IMG_0038

But, today we have a project. So, today, we’ve cleared off the dining room table, brought the sewing machine up, and the ironing board, and we are making some bedding for Kate.

I mused to myself how I would be able to control my “control-freakiness” with Kate, and let her sew without hovering over her.  It turns out, I am not having to, very much. I helped her wind bobbins, pinned some seams on pillowcases, let her sew…and then she kind of got bored. We had 6 long panels, 84 inches by 22 inches, so we sewed them together, then sewed across the top.  Kate drifted off leaving me to zigzag the six long seams and press a hem  in the opening.IMG_0033

Thanks to my panel of experts, who advised me to leave a longer seam allowance, 1/2 inch rather than 1/4, and to zigzag the edges.  IMG_0044

For the opening where the comforter goes in, I have hemmed it, and am thinking about attaching snaps? I am feeling a little lazy, though, and have made comforter covers in the past without them. What are your thoughts? I have snaps in the basement…

Yeah...okay, probably needs snaps.

Yeah…okay, probably needs snaps.

Good-enough Twin Comforter Cover

9 yards cotton quilting fabric, 3 yards each of 3 coordinating fabrics

Cut 25 inches off each fabric length. Choose one that will be the contrasting trim for both pillowcases and cut in half along its width. Set aside.

Cut the selvedges off the long pieces of fabric, and rip them in half along their length. You will have 6 pieces that are 22 inches wide and 83 inches long.

Working with two strips at a time, pin right sides together and sew together with a 1/2 inch seam allowance, then sew the pairs together to make one big tube. Pin the seam on the top of the cover, and sew it together. I lined up my seams at the edges, although as I type this, I realize I could have lined it up any which way, so the strips wouldn’t have the seams at the same place. Next time…And of course, you could make the strips any width.

Take time to zigzag the seam allowances and press the allowances to the darker fabric.

The open end is where you will feed the comforter in.  I double-folded the hem and stitched it down, leaving the center open.

This is where I should have put in snaps… and I probably will.

For the pillowcases, sew the 12 inch long piece of accent fabric to the 25 inch long piece, along the width of the fabric, 38 inches. Press the seam toward the 12 inch side- it will be covered with the folded accent fabric. Fold and sew along the bottom and side. Press a half inch hem along the top of the accent fabric and topstitch down to cover the seam that attaches the two fabrics to each other.


The perfect is the enemy of the good


IMG_0032This is my motto, or one of them, anyway.  The idea is that if you wait until every thing is perfect, then you will miss out on the good- enough moments. For example, Kate has a new down comforter. Her room is on the east side of the house, so the sun wakes her in the morning, but it means it is pretty cold at night. Especially lately, because she closes her door for privacy. This fall when I saw her layering two comforters and three fleece blankets, in addition to pajamas, I was like, “would you like a down comforter?”
Short answer, “yes.”
So we shopped at all the linens and baths and beyonds and things, (which I hate) and I wound up ordering one on Amazon (which I love). While waiting for it to arrive I started sketching ideas for duvet covers, thinking about embroidery, and patchwork, and scalloped edges.
Now…this was before Christmas, the end of the quarter at my school, while Kate was sick and, even though I didn’t know it, I was about to catch the flu (at least I think it was the flu, I felt terrible, but I hope it makes me immune, because I still haven’t gotten a flu shot.) Seriously, it was a terrible time to start a giant quilty craft project.
So, I didn’t.

But I didn’t want to put the comforter on the bed just naked, it needed a cover.
I didn’t actually buy an official duvet cover- I got a king sized sheet and folded it in half and sewed it together. It was the best thing to have done (well, I acknowledge that maybe just buying a pre-made duvet cover would have been easier, but I have mentioned already I hate shopping.)
Now that Christmas is over, and the new quarter at school has started, and Kate is feeling better, and here’s hoping, that was the flu, not just a random virus and I won’t get sick, we went out and bought some fabric.

The middle one is Kate's favorite- it looks much better IRL- pale green with a swirly resist pattern. My favorite is the top one.

The middle one is Kate’s favorite- it looks much better IRL- pale green with a swirly resist pattern. My favorite is the top one.

We found inspiration in Last Minute Patchwork Gifts, by Joelle Hoverson, where I have found inspiration in the past. It was funny, as we flipped though it, Kate kept finding her quilt, and her brother’s, and one that I started for the guest room but still haven’t finished. It is a great beginner’s quilt book.

We found one that was 2 bold fabrics, in vertical stripes and agreed to adapt it.
We hit the fabric store and Kate found three fabrics she really liked in blues and greens.
We got three yards of each, so we would have enough to make pillow cases as well. (the book has directions for pillow cases with contrasting borders, as well.)

Here’s another opportunity to work on my belief that the perfect is the enemy of the good, because I am going to let Kate sew, as much as she wants to. It will be 6 really long straight seams, and they don’t really have to be that straight, in the grand scheme of things. No school for Martin Luther King Day, so maybe we’ll bring the sewing machine up into the sunshine and work on it.

This almost reads as a solid, but there are little dragonflies up close. Love it.

This almost reads as a solid, but there are little dragonflies up close. Love it.

Watch for photos of progress.

Here’s a question- as I understand it, you don’t finish the seams in a quilt with zig-zag or pinking shears because they will get quilted over, and aren’t likely to fray.  With a duvet cover, should we zigzag? Quilty people? Are you there?

Previous Older Entries Next Newer Entries